What you’re building
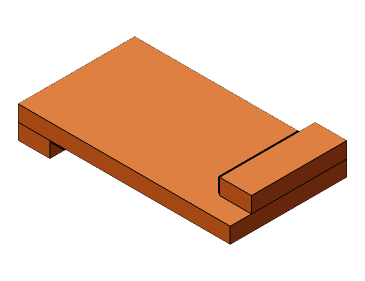
A bench hook is three pieces: a base, a strip on top at the far end called the fence, and a strip underneath at the near end called the hook. The hook catches the front edge of your bench. You push the workpiece against the fence with one hand and saw with the other, and the harder you push, the tighter everything holds. No clamps, no marks on the bench, and the cut is square because the fence is square.
The fence stops an inch short of the front edge. That gap is where the saw runs: it comes down through the workpiece and into the base, never into the fence. After a few dozen cuts the base gets chewed up there. That’s what it’s for.
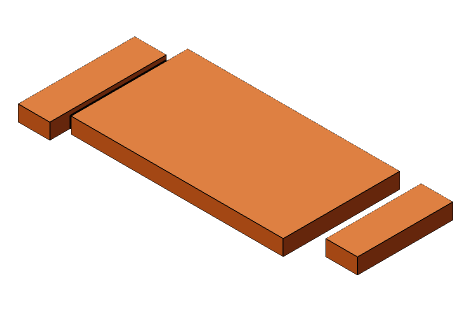
This one is 10 inches long and 5½ wide, from a single 1x6. The fence and hook are strips cut off the end of the same board, so they’re the same width, the same thickness, and the grain runs the same way. Total material: 13 inches. It’s the cheapest thing on this site and the one most people use every day.
Pick the board
Any straight 1x6. Poplar or oak makes a nicer one, but pine works and gets replaced in a few years anyway. The base needs to be flat; sight along it.
Cut
Cut the base at 10 inches. Then cut two 1½-inch strips off the end of the board. Trim one of the strips down to 4½ inches long; that’s the fence. The other stays 5½ and becomes the hook. Square matters more here than on anything else on this site, so take your time on the base’s ends and the fence’s long edges. If the fence isn’t square to the base, neither are your cuts.
Attach the hook
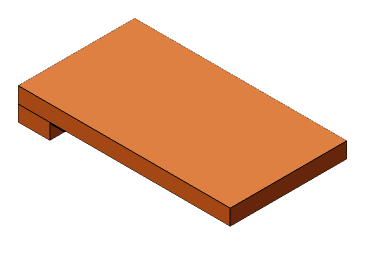
Flip the base upside down. Glue the hook across one end, flush with the end and both sides. Clamp it, and drive two 1¼-inch screws through the hook into the base, countersunk so the heads sit below the surface. Those heads are on the underside, against the bench, so they must not stand proud.
Attach the fence
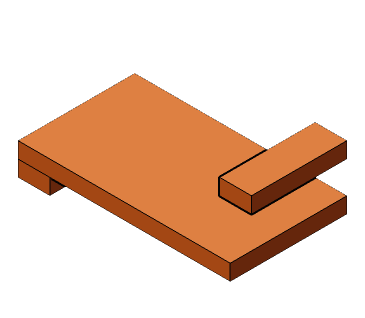
Flip the base right side up. Glue the fence across the other end, flush with the end, flush with the back edge, and 1 inch short of the front edge. Square it to the base’s long edge with your square before the glue grabs. Clamp and drive two 1¼-inch screws down through the fence into the base, again countersunk, and placed toward the back half of the fence where the saw will never reach them.
Finish
Sand the edges just enough to take off splinters. No finish. A finish makes it slippery, and it’s going to get cut anyway.
Use
Hook it over the front edge of the bench. Hold the workpiece against the fence with your off hand, line up the cut with the fence’s end, and saw. For a right-handed saw, the gap goes on the right, so if you’re left-handed, mirror the fence when you attach it.
If something goes wrong
- Cuts aren’t square. The fence isn’t square to the base edge. Back the screws out, reset it against your square, and try again. Or accept it and keep the hook for rough cuts only.
- Saw hits a screw. The fence screws are too close to the gap. Move them toward the back.
- Hook comes loose. It’s mostly the glue holding it; the screws are into end grain. Reglue and let it cure overnight before you lean on it.