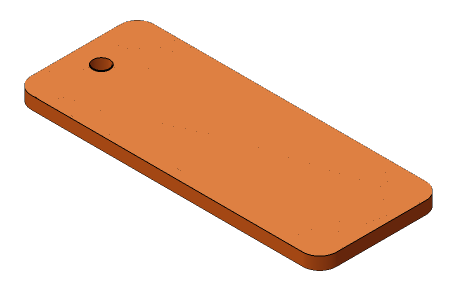
What you’re building
A serving and cutting board from a single length of hardwood 1x8, with the corners rounded and a hole at one end so it can hang. There’s no joinery. The work is choosing the board, shaping the edges, and sanding it properly, which is most of what makes any cutting board good.
Pick the board
This is the one project on the site where the species matters. Construction pine is too soft for a cutting board and takes on stains and smells. Home centers sell S4S hardwood 1x8 in poplar, red oak, and sometimes maple; a lumberyard will have more. Maple is the classic. Poplar is cheap and fine for a serving board that sees a knife occasionally. Skip red oak for anything you’ll cut on, since the open grain holds food.
A 1x8 is ¾ by 7¼ inches. Look for a board with straight grain and no knots in the 18 inches you’ll use, and reject anything cupped, since a cupped board rocks on the counter. You’ll have 78 inches left over, which is enough for several more of these; they make good gifts.
Cut
Cut 18 inches. If the board end is rough or checked, cut that off first and then measure. Square the cut; the ends show.
Round the corners
Mark a 1-inch radius at each corner; a quarter or a bottle cap is about right to trace. Cut close to the line with a jigsaw or coping saw and finish to the line with a rasp and sandpaper, or skip the saw and rasp the whole radius, which takes five minutes per corner.
Drill the hole
Mark the center of the width 1½ inches from one end and drill a 1-inch hole. Clamp a scrap under the board so the bit doesn’t blow out the back face when it breaks through. If you don’t have a 1-inch bit, drill two ½-inch holes side by side and clean up the middle with a rasp.
Sand
Sand every face and edge through 120, 180, and 220. Then wet the whole board with a damp rag, let it dry, and sand again with 220. That raises the grain once so it doesn’t raise the first time the board gets washed. Round over all the edges slightly by hand; a crisp edge on a cutting board dents and splinters.
Oil
Flood the board with mineral oil, let it soak for an hour, wipe off what’s left, and repeat the next day. After that, oil it whenever it starts looking dry. Never put it in a dishwasher. Wash by hand and stand it on edge to dry.
If something goes wrong
- Board cups after the first wash. It was still drying, or it got soaked. Let it dry flat under something heavy, then oil it more thoroughly. A board that’s saturated with oil takes on less water.
- Hole tore out on the back. No scrap underneath. Sand the torn edge round and call it the back.
- Knife marks show fast. Poplar. It’ll still work for years; it just looks used, which is fine.