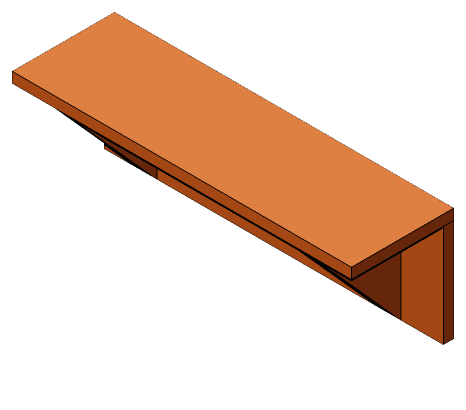
What you’re building
A shelf that screws to the wall through a full-height backboard, with the load carried by two triangular brackets underneath. The backboard is what makes this different from a shelf on metal brackets: it hides the wall screws, it gives the brackets something to glue to, and it turns three thin boards into a rigid L-section that doesn’t sag. The shelf is 24 inches wide, which lands on two studs at 16-inch centers with 4 inches to spare each side.
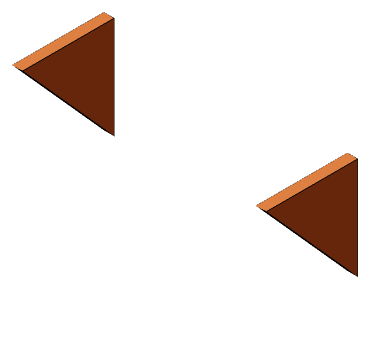
Both brackets come from one 6½-inch piece of the board cut corner to corner. Because the piece is 7¼ inches wide, each triangle ends up with a 7¼-inch leg that goes against the backboard and a 6½-inch leg that goes under the shelf, which is exactly the depth left in front of the backboard. Nothing needs to be trimmed to fit.
Pick the board
A 1x8 is ¾ by 7¼ inches. Pick a flat one; a cupped backboard won’t sit tight to the wall. If the shelf will be visible from the side, choose the board’s cleaner end for the two 24-inch pieces.
Cut
Cut the shelf and backboard at 24, then the bracket blank at 6½. Check the two long pieces against each other; they should match exactly.
Mark a diagonal on the bracket blank from one corner to the opposite corner and cut along it. A hand saw works; a jigsaw is faster. Sand the cut edge of both triangles smooth, since that’s the edge that shows.
Join the shelf to the backboard
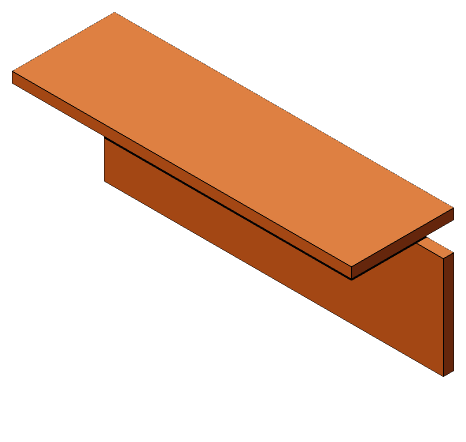
Stand the backboard on its long edge. Run glue along the top edge, set the shelf on it flush with the back face of the backboard, and clamp. Drill six countersunk pilot holes down through the shelf into the backboard edge, evenly spaced, and drive the 1¼-inch screws. The shelf now overhangs the backboard by 6½ inches at the front.
Add the brackets
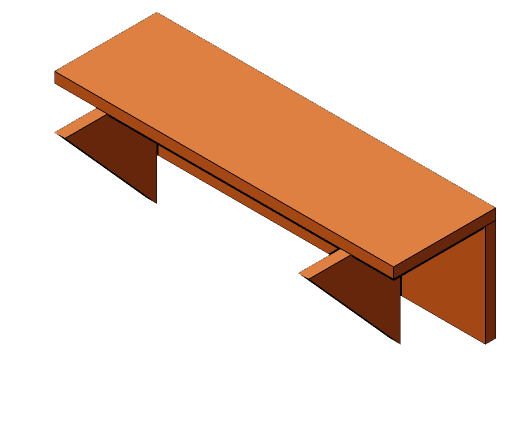
Set a bracket under the shelf 3 inches in from one end, with its long leg flat against the backboard and its short leg flat against the underside of the shelf. Glue both legs. Drive two 1¼-inch screws through the backboard from behind into the bracket’s long leg, and two down through the shelf into its short leg, all countersunk. Repeat at the other end. The screws through the backboard will be against the wall, so countersink those deep.
Finish
Sand to 180, break the front edges. Paint, stain, or oil to match the room. Finish the back of the backboard too, or it’ll cup.
Mount it
Find two studs. Hold the shelf against the wall with a level on it, mark the stud positions on the backboard, and drive one 2½-inch screw through the backboard into each stud, placed low so they’re hidden under the shelf and clear of the brackets. Two screws into studs will carry a row of books.
If something goes wrong
- Shelf sags at the front. The brackets aren’t glued to the shelf, only screwed. Glue carries the load here; screws just hold it while the glue dries.
- Backboard pulls away from the wall at the ends. The board was cupped, or the studs are proud. A third screw in the middle into a drywall anchor closes the gap.
- Diagonal cut wandered. Sand the triangles to match each other, not to the line. Nobody will measure them.