What you’re building
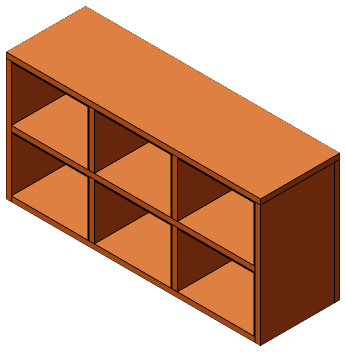
A bench to sit on while you put your shoes on, with the shoes stored underneath. Two rows of three cubbies, each 11 inches wide and just under 8 inches tall, which fits a pair of adult shoes side by side or a pair of boots on their sides. The top is a 36-inch plywood seat, and what stops it from sagging when someone sits on it is the four dividers: they stand in two vertical lines directly under the seat, one row on top of the other, so the load goes down through them to the floor. Line them up carefully and the bench will hold two adults. Offset them and it will still hold, but it will flex.
The back panel screws over the rear edges of everything and squares the case. The seat then covers the top edge of the back, so from the front you see a clean top with no edge.
Pick the sheet
¾-inch plywood. A bench gets sat on and kicked, so a sanded hardwood-veneer sheet (birch is the usual) will hold up and finish better than pine sheathing. Check for flatness.
Cut
Rip two 10½-inch strips the full length of the sheet first, working from the factory edge. From the first, crosscut the two 34½-inch shelves and one 17¼-inch side. From the second, the other side and the four dividers at 7⅞. From the remaining 26¾-inch-wide piece, cut the 36-inch seat at 11¼ wide and the 36-inch back at 17¼ wide, end to end along the length. Cut all four dividers with the same setup; their matching height is what keeps the seat level and the load path straight. Label everything.
Edge-band the front edges of the seat, sides, shelves, and dividers now if you’re doing it.
Mark the sides and shelves
On the inside face of each side, mark the bottom shelf from 0 to ¾ inch and the middle shelf from 8⅝ to 9⅜ inches. On the top face of the bottom shelf and both faces of the middle shelf, mark divider positions: each divider is ¾ inch thick, with its near face at 11 inches and 22¾ inches from one end, so the three bays are each 11 inches wide. The marks on the top of the bottom shelf and the underside of the middle shelf must line up, and the marks on the top of the middle shelf must match them. Measure from the same end every time.
Assemble the case
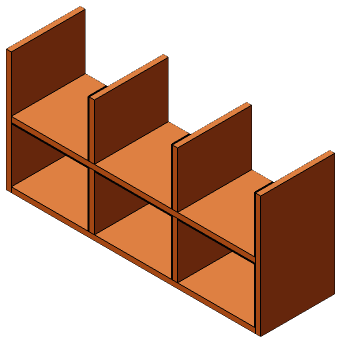
Stand the sides on their back edges. Glue and set the bottom shelf between them on its marks, flush with the front edges, and the middle shelf the same way. Clamp, check square, and drive three 1⅝-inch screws through each side into each shelf end. Then set the two lower dividers on their marks between the bottom and middle shelf, glue both ends, and screw down through the middle shelf into each and up through the bottom shelf into each, two screws per end. Repeat for the two upper dividers on top of the middle shelf; they’ll stand proud until the seat is on.
Attach the back
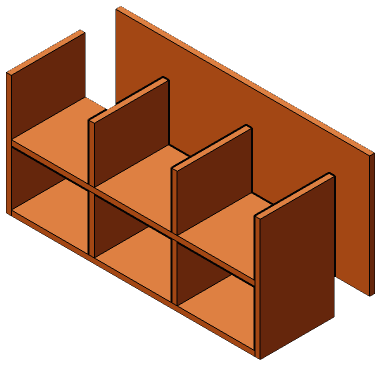
Lay the case face down. Set the back over the rear edges, flush at the ends and bottom; it should be flush with the top of the sides as well. Push the case square against it and screw every 6 to 8 inches into the sides and both shelves, and one screw into each divider through the back. Glue helps here.
Attach the seat
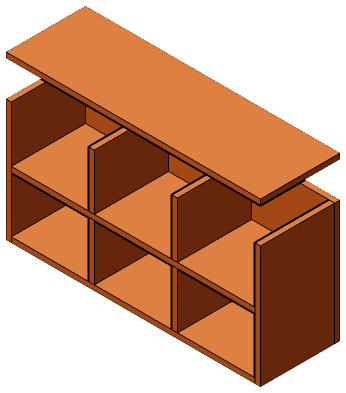
Set the seat on top, flush at the back and both ends; it overhangs nothing, since the sides plus the back add up to its depth. Glue the top edges of the sides, back, and upper dividers, and screw down through the seat: three into each side, one every 8 inches into the back, and two into each divider. Countersink these well and fill them; this is the surface people will see and sit on.
Finish
Sand to 180, round the front edge of the seat with a rasp and sandpaper so it’s comfortable behind the knees, and finish. Paint or a wipe-on poly. A seat cushion is optional; the bench is fine bare.
If something goes wrong
- Seat flexes. The upper and lower dividers aren’t in line, or the upper ones are short. Check with a straightedge across the top of the upper dividers before the seat goes on.
- Cubbies are different widths. Divider marks were measured from different ends. Cosmetic.
- Back stands proud of the sides. The sides came out short. Plane or sand the back’s top edge flush before the seat goes on.